Carnivore Ice Cream (So Good It Fooled the Kiddos!)
I never thought I’d be writing about an ice cream recipe made with such simple ingredients, but here we are. If someone had told me a year ago that a carnivore-friendly ice cream would become one of the most requested treats in my house, I probably would have laughed.
The funny thing is, this recipe came from a family member who has been following a carnivore lifestyle for quite some time. She kept insisting that I try her homemade carnivore ice cream and promised that it tasted like a real dessert. I’ll admit I was skeptical. Ice cream without all the usual ingredients? I wasn’t convinced.
Last weekend, I finally decided to make a batch for my family. I didn’t tell the kids anything special about it. I simply scooped it into bowls and served it after dinner.
To my surprise, they absolutely loved it.
One of them even asked if I could make it again the following weekend. That’s when I knew this recipe was something special.
Now it’s become one of my favorite treats to make when I’m craving something sweet but want to keep things simple. Whether I’m relaxing after a busy week, celebrating a good day, or just looking for a fun weekend dessert, this carnivore ice cream always hits the spot.
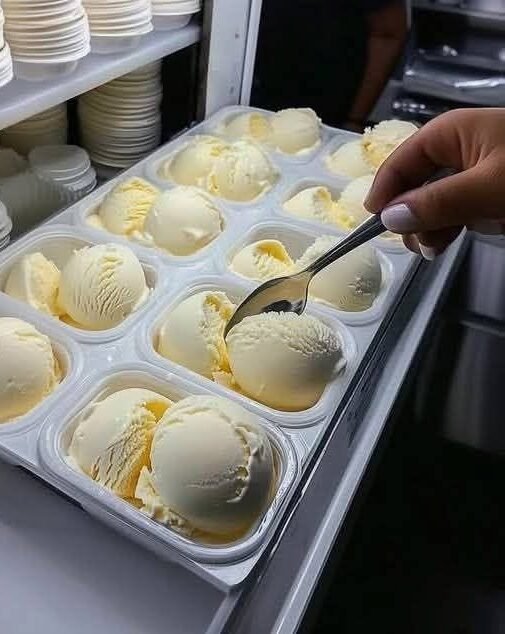
The texture is rich and creamy, almost like a frozen custard, and the flavor is surprisingly satisfying despite the short ingredient list.
Why You’ll Love This Recipe
Made with only a few ingredients
Carnivore-friendly
Rich and creamy texture
Easy to prepare
No complicated steps
Great for meal prep
Kid-approved in my house
Recipe Information
Prep Time: 10 minutes
Freeze Time: 4–6 hours
Total Time: 6 hours 10 minutes
Servings: 6
Full Carnivore Ice Cream Recipe
Ingredients
2 cups heavy whipping cream
4 large egg yolks
2 tablespoons raw honey (optional, if your version of carnivore includes it)
1 teaspoon vanilla extract (optional)
Pinch of sea salt
Strict Carnivore Version
For a stricter carnivore approach, use:
2 cups heavy cream
4 egg yolks
Pinch of salt
That’s it.
Equipment
Mixing bowl
Whisk
Saucepan
Fine mesh strainer
Freezer-safe container
Ice cream maker (optional)
Instructions
Step 1: Heat the Cream
Pour the heavy cream into a saucepan.
Heat over medium-low heat until small bubbles begin forming around the edges.
Do not allow it to boil.
Step 2: Whisk the Egg Yolks
In a separate bowl, whisk the egg yolks until smooth and slightly lighter in color.
If using honey and vanilla, whisk them in now.
Step 3: Temper the Eggs
Slowly add a small amount of the warm cream into the egg yolks while whisking constantly.
Continue adding the cream gradually.
This prevents the eggs from scrambling.
Step 4: Cook the Custard
Pour the mixture back into the saucepan.
Cook over low heat, stirring constantly.
After about 5–8 minutes, the mixture will thicken enough to coat the back of a spoon.
Remove from heat immediately.
Step 5: Strain and Chill
Pour the custard through a fine mesh strainer into a clean bowl.
Add the pinch of salt.
Allow it to cool to room temperature.
Cover and refrigerate for at least 2 hours.
Step 6: Freeze
Option 1: Ice Cream Maker
Pour the chilled mixture into an ice cream maker and churn according to the manufacturer’s instructions.
Transfer to a freezer-safe container and freeze for 2–3 hours.
Option 2: No Ice Cream Maker
Pour the chilled mixture into a freezer-safe container.
Freeze for 4–6 hours.
Stir every hour for the first 3 hours to help create a smoother texture.
Step 7: Serve
Let the ice cream sit at room temperature for 5 minutes before scooping.
Serve and enjoy.
Tips for the Creamiest Ice Cream
Use Quality Cream
The higher the fat content, the creamier the final result.
Don’t Rush the Custard
Cooking slowly creates a silky smooth texture.
Chill Thoroughly
A fully chilled base freezes much better and develops a richer texture.
Let It Soften Before Serving
This ice cream can freeze quite firm, so a few minutes on the counter helps.
Variations
Brown Butter Carnivore Ice Cream
Brown a few tablespoons of butter and whisk it into the warm custard.
Salted Carnivore Ice Cream
Add an extra pinch of flaky sea salt for a sweet-and-salty flavor profile.
Extra Rich Version
Use additional egg yolks for a custard-style texture.
Storage
Store in an airtight freezer-safe container.
Best enjoyed within 2 weeks.
Press a piece of parchment paper directly onto the surface before sealing to reduce ice crystals.
Frequently Asked Questions
Is carnivore ice cream actually good?
Honestly, I was surprised by how delicious it turned out. The rich cream and egg yolks create a flavor and texture that feels much more indulgent than you’d expect.
Can I make it without an ice cream maker?
Absolutely. The no-churn method works very well.
Why are egg yolks used?
Egg yolks create a creamy, custard-like texture and help prevent the ice cream from becoming icy.
Can I use whole eggs?
You can, but egg yolks alone provide a richer texture.
Is honey required?
No. The strict carnivore version skips honey entirely.
How long does it last?
Stored properly, it stays fresh for about 2 weeks in the freezer.
Why is my ice cream hard to scoop?
Homemade ice cream often freezes harder than store-bought varieties because it doesn’t contain stabilizers. Let it sit at room temperature for a few minutes before serving.
Final Thoughts
Some recipes become favorites because they’re fancy, while others become favorites because they surprise you. This Carnivore Ice Cream definitely falls into the second category.
When I made it with my family last weekend, I wasn’t sure what to expect. What I got was a rich, creamy dessert that everyone enjoyed—including the kids. Seeing empty bowls and hearing requests for another batch was all the proof I needed.
If you’re looking for a simple carnivore-friendly treat that feels indulgent without requiring a long list of ingredients, this recipe is definitely worth trying. It might just fool the kiddos in your house too!