
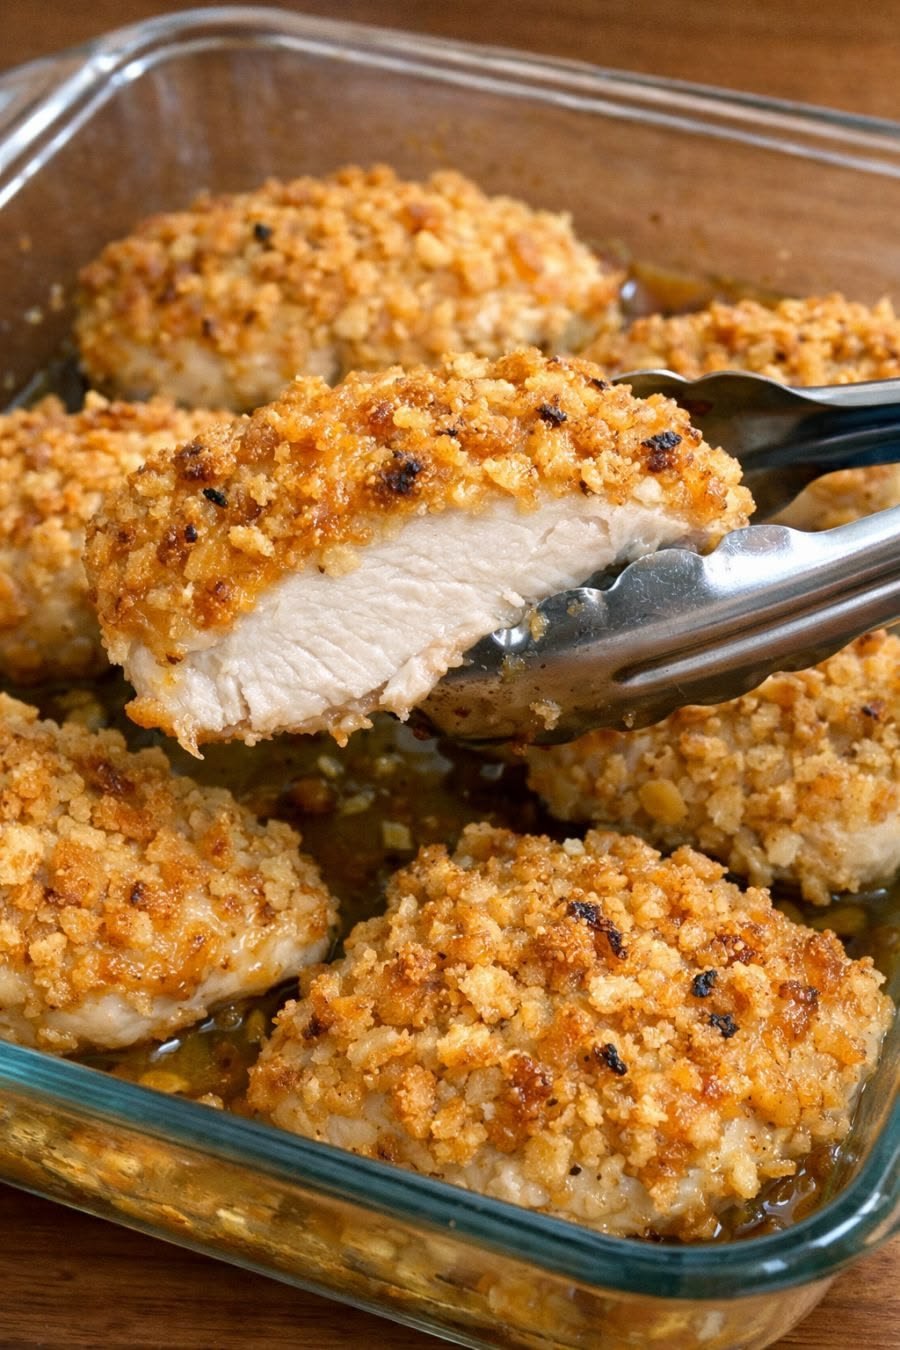
Oven Baked 3-Ingredient Butter Cracker Chicken
If you love crispy chicken but don’t want to deal with a long ingredient list, this Oven Baked 3-Ingredient Butter Cracker Chicken is exactly the kind of recipe to keep handy.
It’s incredibly simple: tender chicken, buttery crackers, and a little melted butter come together to create a golden, crunchy coating that tastes far more special than the effort required.
I love making this on those weekends when I want something homemade and comforting but don’t feel like spending hours in the kitchen. The first time I made it, I wasn’t expecting such a basic cracker coating to turn out so delicious. The crackers became wonderfully crisp around the edges while the chicken stayed tender and juicy inside.
Everyone loved it. And honestly, watching people reach for seconds before I’d even finished serving dinner is always a good sign!
❤️ Why You’ll Love This Recipe
Only 3 simple ingredients
Crispy oven-baked coating
Tender, juicy chicken
No frying required
Quick preparation
Family-friendly
Budget-friendly
Perfect for busy weeknights
Great with almost any side dish
Minimal cleanup
📋 Recipe Information
Prep Time: 10 minutes
Cook Time: 30–35 minutes
Total Time: About 45 minutes
Servings: 4
Course: Dinner, Main Dish
Cuisine: American
Difficulty: Easy
Ingredients
4 boneless, skinless chicken breasts, about 6 ounces each
2 cups butter crackers, finely crushed
4 tablespoons unsalted butter, melted
That’s it!
For a little extra flavor, you can add salt, black pepper, garlic powder, or paprika, but the basic recipe needs only three ingredients.
🍳 Equipment Needed
Baking sheet
Parchment paper or nonstick spray
Shallow bowl
Small bowl
Rolling pin or food processor
Tongs
👩🍳 How to Make 3-Ingredient Butter Cracker Chicken
Step 1: Preheat the Oven
Preheat your oven to 400°F (200°C).
Line a baking sheet with parchment paper or lightly grease it.
Step 2: Prepare the Crackers
Place the butter crackers in a resealable bag and crush them with a rolling pin.
You can also pulse them in a food processor.
Don’t turn them into a completely fine powder. A mixture of small crumbs and slightly larger pieces gives the chicken a much better crunchy texture.
Transfer the crumbs to a shallow bowl.
Step 3: Prepare the Chicken
Pat the chicken breasts dry with paper towels.
If the breasts are very thick, gently pound them to an even thickness. This helps them cook more evenly and prevents the thinner portions from drying out.
Step 4: Coat With Butter
Pour the melted butter into a shallow bowl.
Dip each chicken breast into the melted butter, turning to coat both sides.
Allow any excess butter to drip back into the bowl.
Step 5: Add the Cracker Coating
Immediately place the butter-coated chicken into the crushed crackers.
Press the crumbs firmly onto both sides so they stick well.
Place each coated chicken breast onto the prepared baking sheet.
For an especially crunchy coating, gently press a little extra cracker crumb over the top.
Step 6: Bake
Bake uncovered for approximately 30–35 minutes, depending on the thickness of the chicken.
The cracker coating should be golden brown and crisp.
The chicken should reach an internal temperature of 165°F (74°C) in the thickest part.
Step 7: Rest and Serve
Remove the chicken from the oven and let it rest for about 5 minutes before serving.
This helps the juices settle while the crispy coating stays intact.
Serve warm with your favorite sides.
💡 Tips for Success
Don’t Crush the Crackers Too Finely
A few larger crumbs give you those wonderful crunchy bits that make this chicken so good.
Pound Thick Chicken Breasts
Uniform chicken breasts cook more evenly and are less likely to dry out.
Press the Crumbs On
Don’t simply roll the chicken through the crackers. Gently press the crumbs onto the surface so you get a thicker, more even coating.
Use a Baking Rack
For an even crispier bottom, place the chicken on a wire rack set over your baking sheet. This allows hot air to circulate underneath.
Don’t Overbake
Chicken breasts can dry out quickly. Start checking the internal temperature toward the end of the suggested cooking time.
Let It Rest
A short rest keeps the chicken juicy and gives the crispy coating a chance to settle.
🧈 Delicious Variations
Garlic Butter Cracker Chicken
Add ½ teaspoon garlic powder to the cracker crumbs for a simple garlic twist.
Parmesan Cracker Chicken
Mix ¼ cup grated Parmesan into the crushed crackers.
The cheese becomes golden and delicious as it bakes.
Ranch Cracker Chicken
Add a little dry ranch seasoning to the cracker crumbs for a creamy, savory flavor.
Spicy Butter Cracker Chicken
Add a pinch of cayenne pepper or crushed red pepper flakes to the cracker coating.
Chicken Tenders
Cut the chicken breasts into strips before coating them.
Reduce the baking time and check for doneness early because smaller pieces cook faster.
🍽️ What to Serve With It
This crispy chicken pairs beautifully with simple comfort-food sides.
Try serving it with:
Mashed potatoes
Roasted potatoes
Green beans
Steamed broccoli
Buttered corn
Macaroni and cheese
Coleslaw
Garden salad
Roasted carrots
Dinner rolls
I especially love serving it with mashed potatoes and green beans. It’s a simple combination that feels like a classic family dinner.
🥣 Easy Dipping Ideas
Although the chicken is delicious on its own, a dipping sauce makes it even more fun.
Try:
Honey mustard
Ranch dressing
Barbecue sauce
Garlic butter
Creamy Parmesan sauce
Lightened-up ranch
For kids, a little honey mustard on the side is always a favorite.
🥡 Storage Instructions
Refrigerator
Allow leftover chicken to cool before placing it in an airtight container.
Refrigerate for 3–4 days.
Reheating
For the crispiest results, reheat the chicken in a 375°F (190°C) oven or air fryer until heated through.
Avoid microwaving if possible because the cracker coating can become soft.
Freezer
The baked chicken can be frozen in an airtight freezer-safe container for up to 2 months.
For best results, freeze individual portions and reheat them in the oven or air fryer.
📊 Approximate Nutrition Per Serving
Calories: 430
Protein: 43g
Fat: 22g
Carbohydrates: 18g
Fiber: 1g
Sodium: 600mg
Nutrition is approximate and will vary depending on the chicken size and the specific butter crackers used.
❓ Frequently Asked Questions
Can I use chicken thighs?
Absolutely. Boneless, skinless chicken thighs work very well and tend to stay especially juicy.
Can I use salted butter?
Yes. If using salted butter, you may want to avoid adding additional salt to the cracker crumbs.
Can I use another type of cracker?
Yes. Saltines, cheese crackers, or other crisp crackers can work, although butter crackers give this recipe its signature rich flavor.
How do I make the chicken extra crispy?
Use a wire rack over the baking sheet and avoid overcrowding the chicken. You can also lightly press extra crumbs onto the top before baking.
Can I prepare this ahead of time?
Yes. Coat the chicken several hours ahead, cover it, and refrigerate until you’re ready to bake. For the crispiest coating, bake soon after coating.
Can I make this with chicken tenders?
Definitely. Chicken tenders are perfect for this recipe and are especially convenient for families with kids. Just reduce the cooking time and check the internal temperature early.
Why is my cracker coating falling off?
Make sure the chicken is patted dry before dipping it in butter. Also, press the cracker crumbs firmly onto the chicken rather than simply sprinkling them over the top.
❤️ Final Thoughts
This Oven Baked 3-Ingredient Butter Cracker Chicken is proof that a great family dinner doesn’t have to be complicated.
With just chicken, butter crackers, and butter, you get juicy chicken wrapped in a wonderfully crisp, golden coating. It’s comforting, easy, and versatile enough to fit into almost any dinner plan.
It’s one of those recipes I reach for when I want something everyone will enjoy without standing over the stove all evening.
And when the kitchen smells like warm butter and toasted crackers while the chicken is baking, you know dinner is going to be good.